
I found one thing I miss from living in Utah, the Sundance Film Festival in Park City. I took this photo in 2014 on our annual–go see what it’s all about—visit. We had the opportunity to say hello to Sam Shepard and to Gilles Marini.

© 2014 Louise Levergneux, Sundance Film Festival
Getting back to the work at hand. It’s difficult to keep the processes and steps straight with three projects on the go, no four!
I’m waiting for an order of paper to finish the last two copies of my book entitled Conversation. After two months, finishing these copies with my notes might be a challenge!!
Meanwhile, I’m tinkering with Tinkercad for my second book entitled Finding Home. An emotional project that tackles my experience of living in Idaho while still rooted in Canada... I will discuss the many changes and end product later.
I am learning the ins and outs of 3D printing and enjoying the sculptural facet of the process. A third print is happening today and will take nine and a half hours to print over 497 layers. Fascinating!
I thought it might be fun to sit and take photos as my object was printing till I saw this timelapse video of a Ultimaker 2 printing a deer. Have you ever heard the expression “it’s like watching paint dry”!
The binding and slipcase for my artists’ book Xtraction is also in the queue to be 3D printed, hurray!
While we wait for paper and prints, lets look at the steps it took to create the flip book for Xtraction. The idea grew from this X-ray. In this instance I used a mix of stills and video taken with my Sony D-SLR.
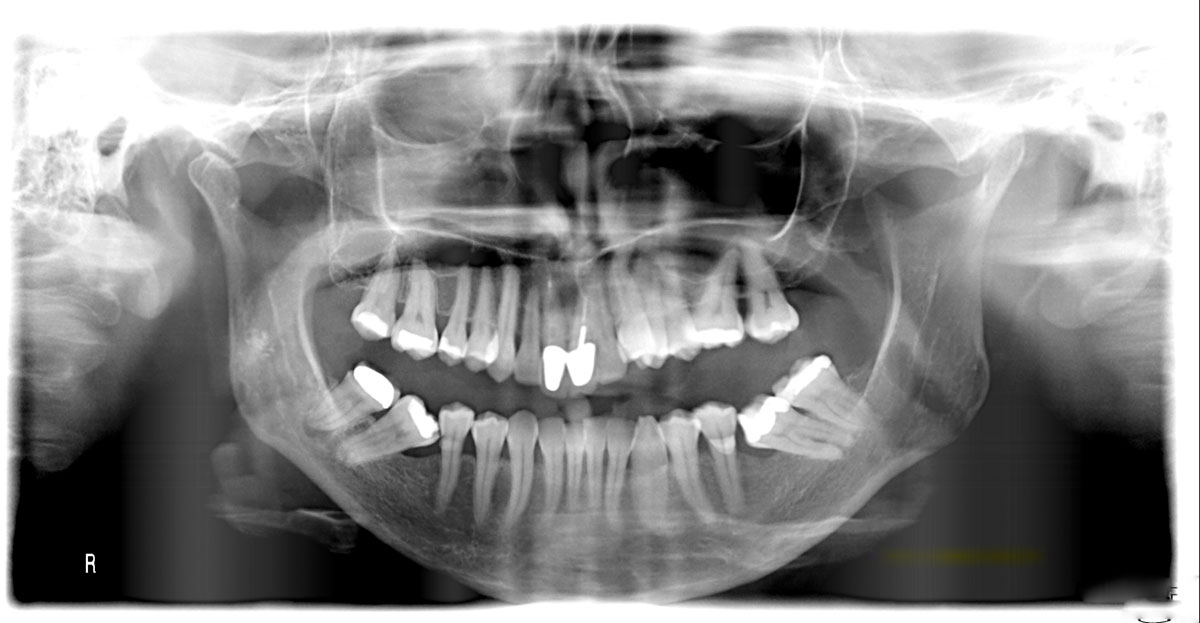
© 2013 Louise Levergneux
1. First, the stills are manipulated in Photoshop and the video manipulated in iMovie
2. Next, I import the frames from the video into layers in Photoshop
3. Once, the layers are all chosen and sequenced, they are resized into another Photoshop template, I number all the pages—yes, number, it makes it easier to sort. Have you ever had 120 unnumbered pages fall to the floor and not knowing the sequence? I have! FUN! FUN! FUN!
4. All the adjustments in the next step is great fun for people with OCD, as all the layers have different opacity between bottom and top layers for each group of images. The flip book has 120 pages counting the colophon
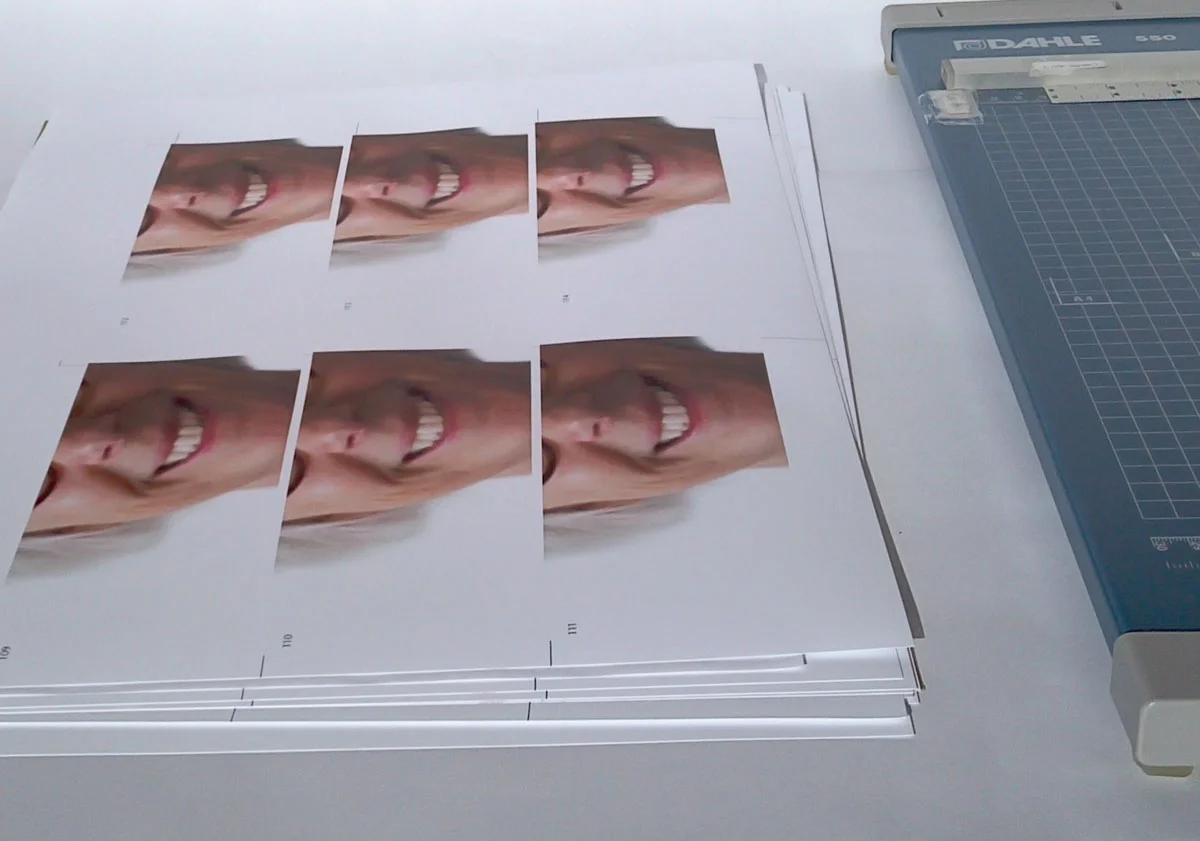
5. Shown are 13" x 19" sheets of pages in Bridge ready for print

© 2014 Louise Levergneux, Xtraction
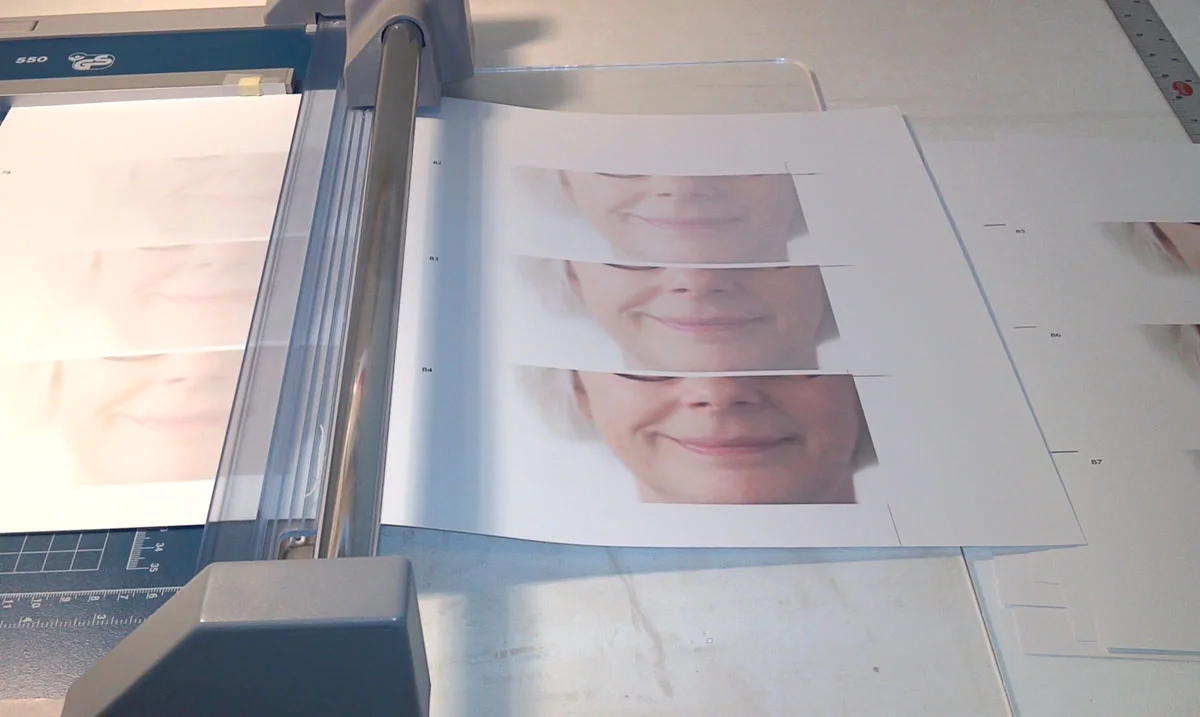
6. My printer co-operated, thank God! This does not always happen, everyone knows that! I start the cutting phase after the sheets rest for 24 hours. This time relaxes the paper and removes any curling from wet ink. Dried ink allows the paper to be handled without concerns
© 2014 Louise Levergneux, Xtraction
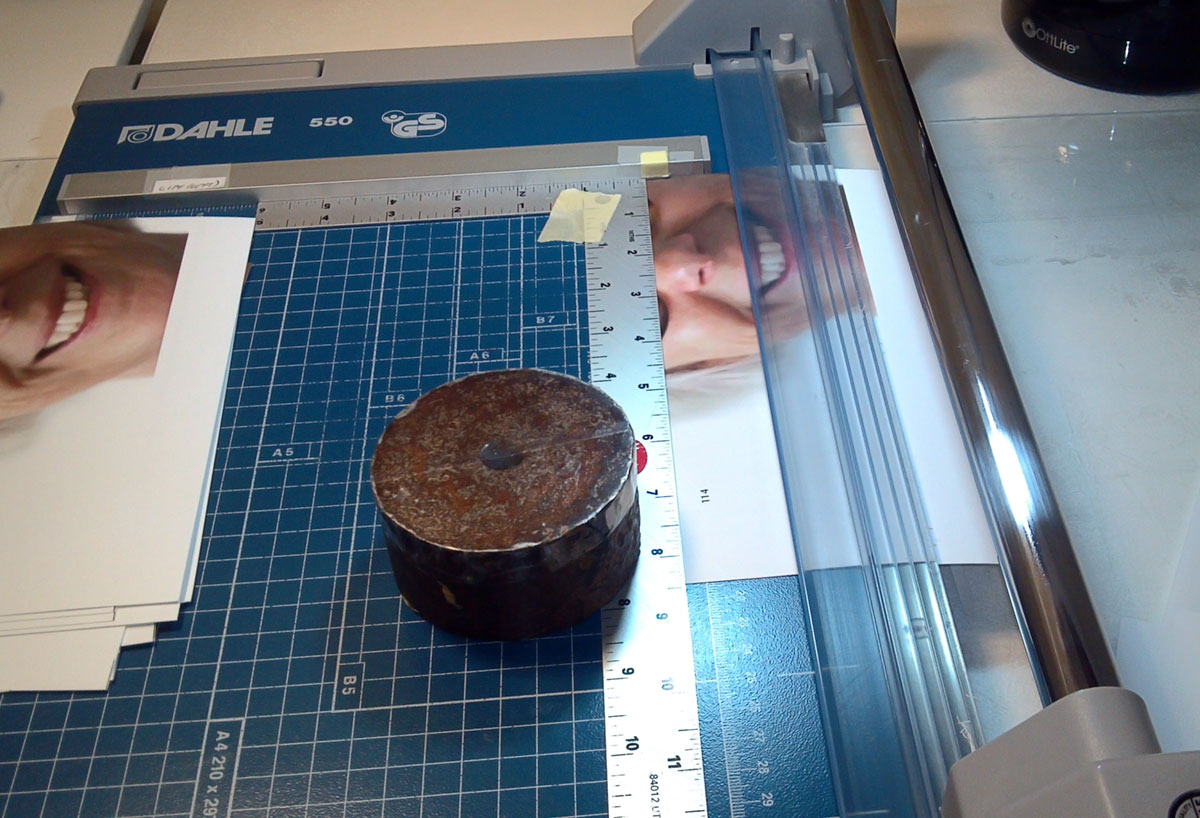
7. Each page goes through a five steps cutting process, this ensures perfect placement of image on each page. The time taken in properly cutting each page properly gives a smooth action when flipping pages. I know these steps by heart after cutting pages for 156 flip books in the last 3 years. First cut is done by dividing the sheet in half.
© 2014 Louise Levergneux, Xtraction

© 2014 Louise Levergneux, Xtraction
The second cut is done by following the cutting lines for the top of each page.

© 2014 Louise Levergneux, Xtraction
Making sure that all the pages are trimmed at the exact same place on the right edge is the third cut.

© 2014 Louise Levergneux, Xtraction
The fourth step is to properly cut the bottom of each page by using a straight edge that will not move.
© 2014 Louise Levergneux, Xtraction
The last and fifth cut is the left side with a pre-determined length for the flip book.
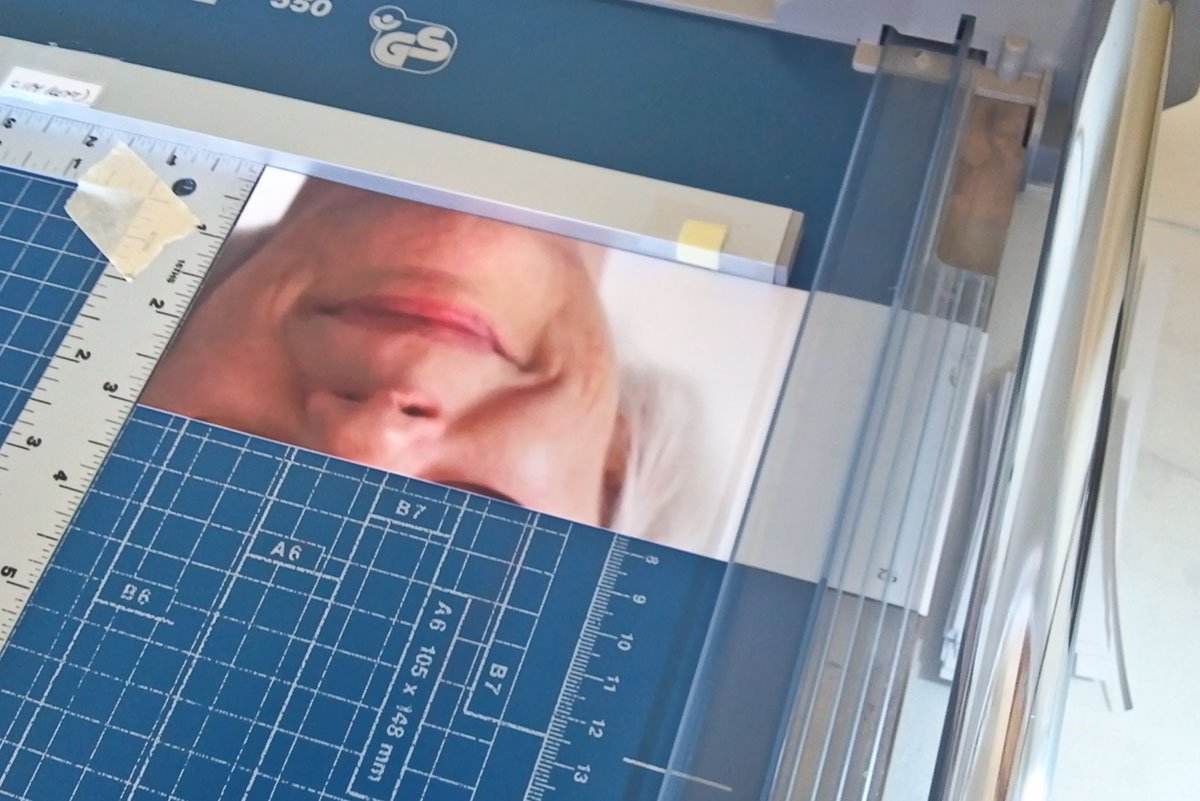
© 2014 Louise Levergneux, Xtraction
I sort and stack, then punch holes through the pages to receive screw posts
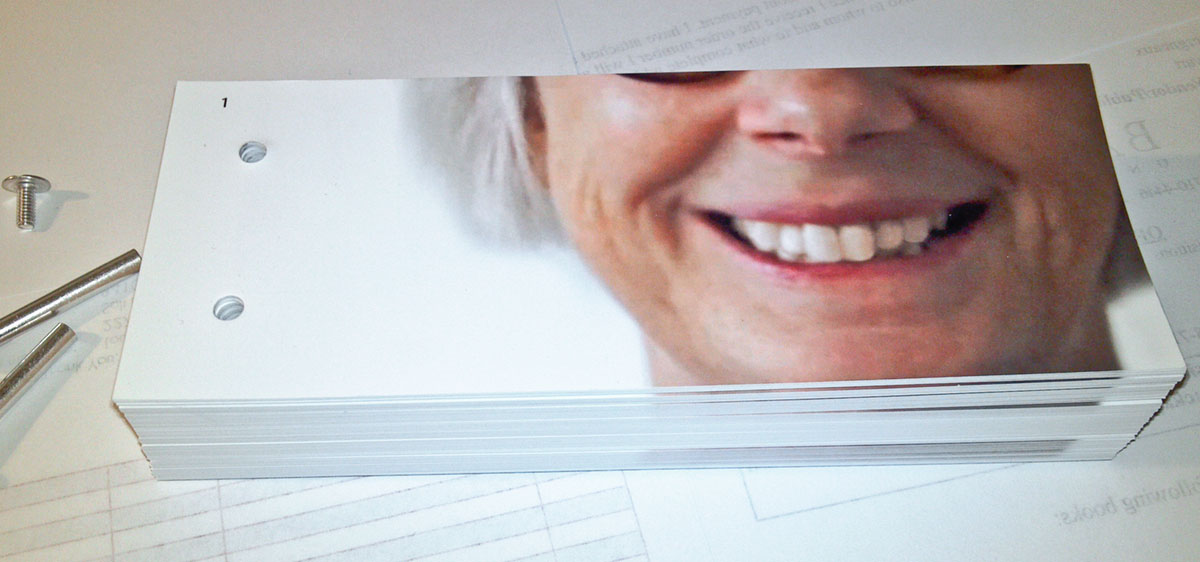
© 2014 Louise Levergneux, Xtraction
A small binding with cloth over boards is usually cut and assembled to finish the book. Xtraction has a 3D printed binding so this step is omitted
Voilà, one finished flip book. I will have photos of the completed project next week.
The fourth project I mentioned above is the image manipulation, printing and cutting of the last volumes of City Shields. Forever!
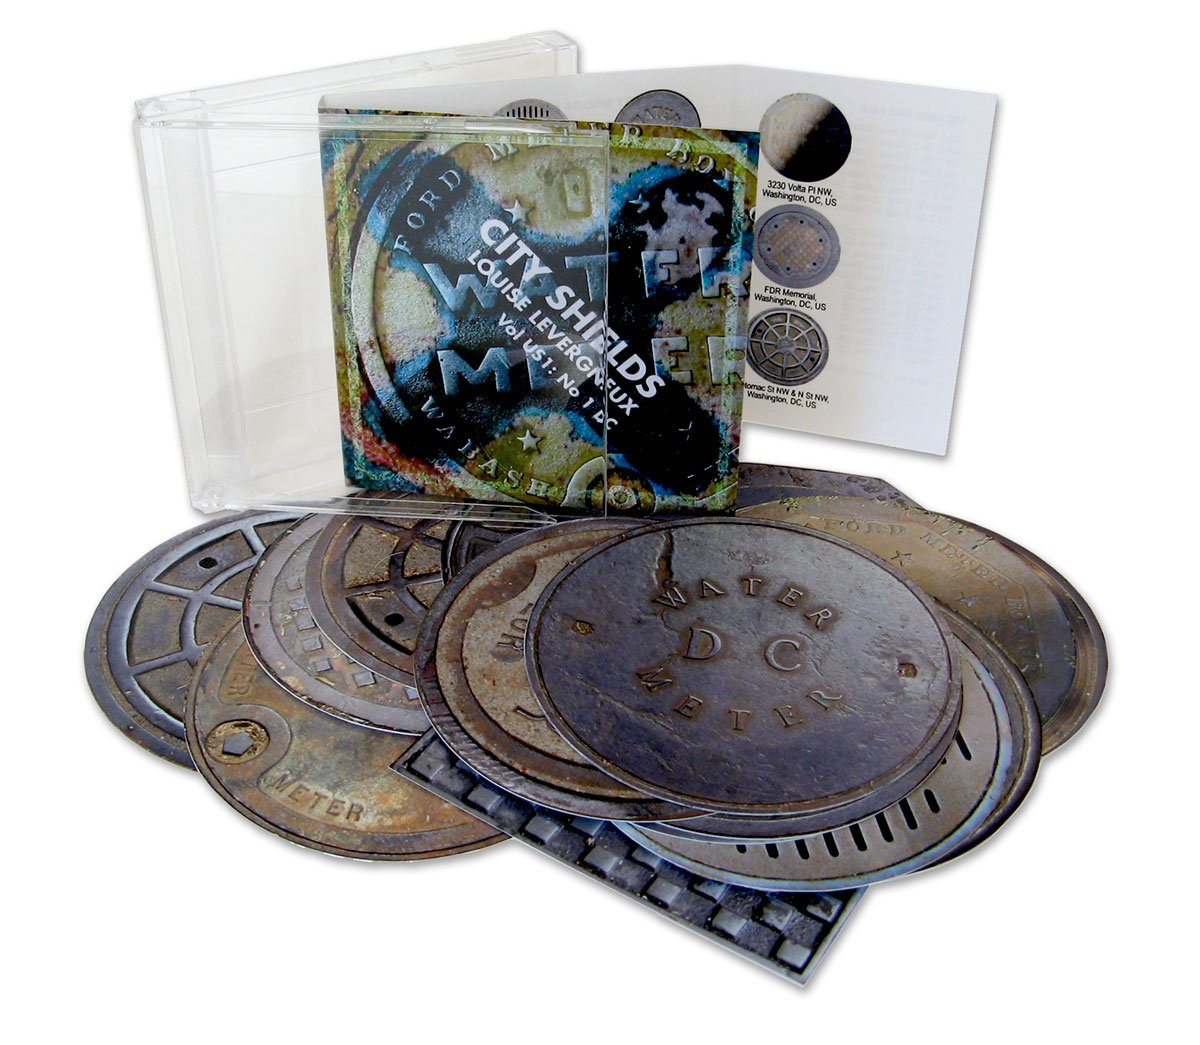
© 2011 Louise Levergneux, City Shields
This will take more than a week, need to get going.